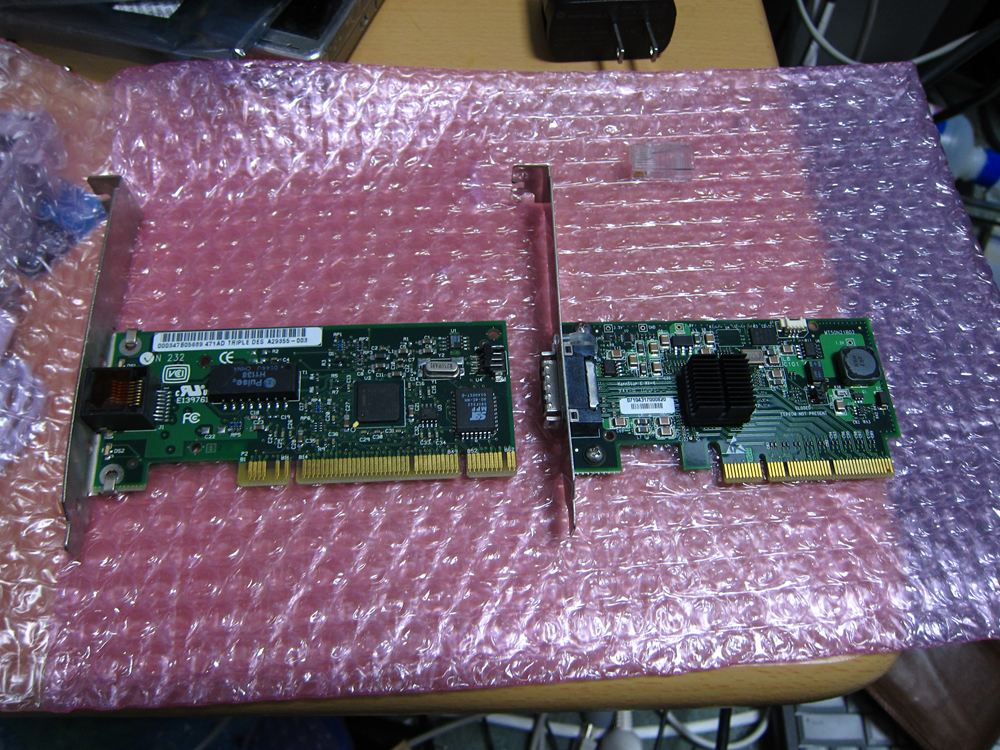
今回導入したのは、ヤフオクで安かったDDR(20Gb)のシングルポートのCisco SFS-HCA-320-A1で、InfinihostIII Lxを搭載したカードです。
lshwの結果です。
description: InfiniBand
product: MT25204 [InfiniHost III Lx HCA]
vendor: Mellanox Technologies
physical id: 0
bus info: pci@0000:02:00.0
version: 20
width: 64 bits
clock: 33MHz
capabilities: pm vpd msi msix pciexpress bus_master cap_list
configuration: driver=ib_mthca latency=0
resources: irq:16 memory:f3e00000-f3efffff memory:f2800000-f2ffffff
以前ハンズオンで見たときに、みんな大好きIntel Pro100(/S)だと思ってひょいと持ち上げたらIB HCAだったことがありましたが…改めてみてみるとやっぱり似ています。多分。
このHCAで、とりあえずDebian/wheezyでIPが通るようになるまで色々してみました。
PC構成
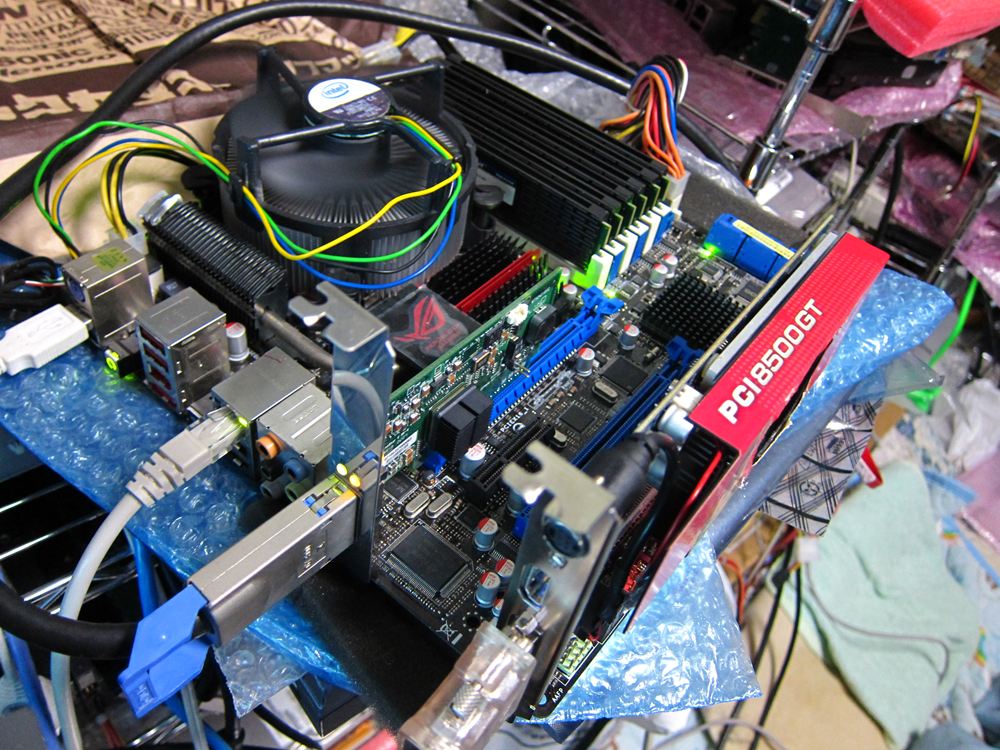
ibhack(OpenSMホスト)
MB:Asus RampageGenieII
CPU:Xeon E5620@3GHz
Mem:6 x 4GB@1333MHz
HCA@一番上のPCI-ex 2.0 x16レーン
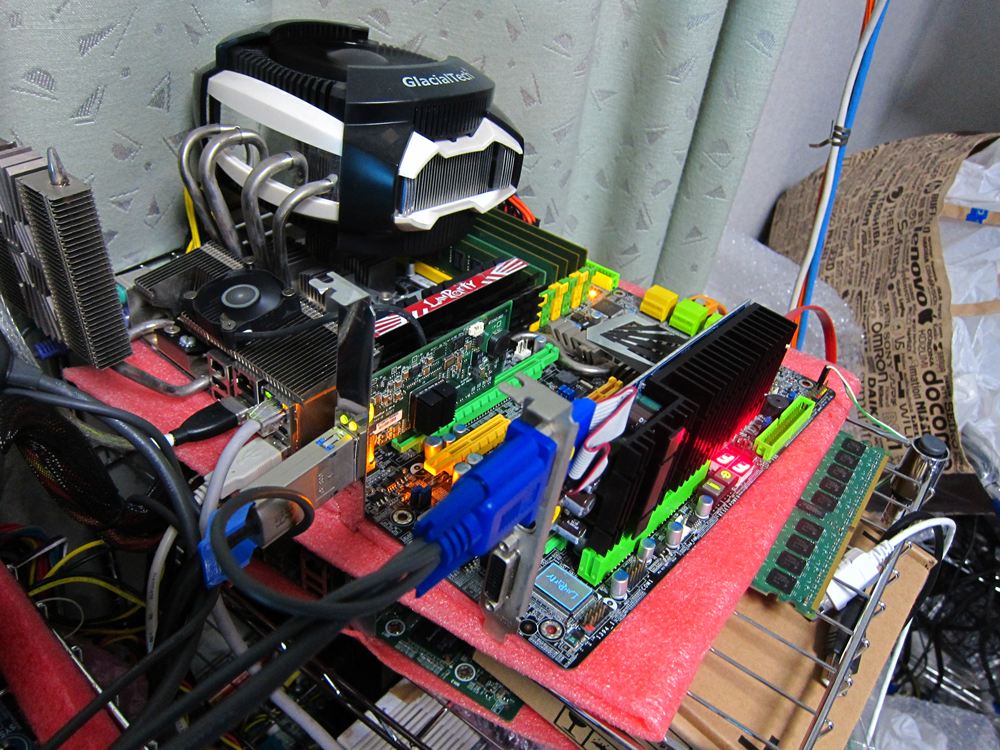
ib1(クライアント)
MB:DFI LANPARTY UT X58 T3eH8
CPU:Xeon Corei7 920@3.2GHz
Mem:6 x 2GB@1333MHz
HCA@一番上のPCI-ex 2.0 x16レーン
これらのPCにそれぞれDebian/Squeezeを入れ、/etc/apt/souces.listをsqueezeからtestingに変え、dist-upgradeしました。
root@ibhack:~/ib# uname -a
Linux ibhack 3.2.0-4-amd64 #1 SMP Debian 3.2.32-1 x86_64 GNU/Linux
ただ動かすだけならapt-getで入る
必要なものは既にレポジトリにあるので、apt-get install opensmで入ります。が、パッケージのバージョンが2009年付けと少し古いので自分でコンパイルしました。
コンパイル済みdebパッケージ
長いので作るのが面倒な人向けに先においておきます。dpkg -i *.debすれば多分入ると思います。
oepnsm-3.5-for-debian/Wheezy-2012-11-29-testing.tgz
内容
drwxr-xr-x 3 root root 4096 Nov 29 01:14 etc/
-rw-r--r-- 1 root root 8509032 Nov 29 01:10 ibutils_1.5-1_amd64.deb
-rw-r--r-- 1 root root 598370 Nov 29 01:10 infiniband-diags_1.6.1-1_amd64.deb
-rw-r--r-- 1 root root 35912 Nov 29 01:10 libibcommon_1.2.0-1_amd64.deb
-rw-r--r-- 1 root root 272960 Nov 29 01:10 libibmad_1.3.9-1_amd64.deb
-rw-r--r-- 1 root root 85520 Nov 29 01:10 libibumad_1.3.8-1_amd64.deb
-rw-r--r-- 1 root root 1136658 Nov 29 01:10 opensm_3.3.15-1_amd64.deb
OFEDスタックを動かしたかった
既知の事実ですがOFEDの中に含まれるinstall.plは動かないので、SRPMディレクトリの中からrpm2cpioで分解してソースを取り出してmakeしていたりしたのですが、そんなことをしなくてもここに最低限必要な物はありました。ここからいろいろ持ってきます。
http://www.openfabrics.org/downloads/management/
パッケージのダウンロード
ここにある
libibumad
libibmad
libibcommon
opensm
infiniband-diags
をまずDLします。
wget http://www.openfabrics.org/downloads/ma ... 3.8.tar.gz http://www.openfabrics.org/downloads/ma ... 3.9.tar.gz http://www.openfabrics.org/downloads/ma ... 2.0.tar.gz http://www.openfabrics.org/downloads/ma ... 6.1.tar.gz http://www.openfabrics.org/downloads/ma ... .15.tar.gz
Make&&checkinstall -D
まず、ビルドに必要になる物を入れます。
apt-get install checkinstall flex btyacc build-essential
手順としては
libibumad→libibmad→libibcommon→infiniband-diags→opensm→infiniband-diags
の順でmakeしていくだけです。ただし、./configure &&make&&make installすると、必要なライブラリが/usr/local/libにインストールされるのですが、
DebianとRH系ではusr/binとusr/libの位置が違うので、./configure --prefix=/usrしてインストールするパッケージの位置を変えないと色々困ります。debianでは/usr/local/libにパスが通っていないので、そのまま実行しても
root@ibhack:~/ib/opensm-3.3.15# opensm
opensm: error while loading shared libraries: libosmvendor.so.3: cannot open shared object file: No such file or directory
と言われます。そのまま
./configure&&make&&make install
でインストールして
export 'LD_LIBRARY_PATH=/usr/local/lib'
とか、makeするまえに
ln -s /usr/ /usr/local
とかしても動きますが、おすすめはしません。また、パッケージ管理が出来なくなるのでcheckinstall -Dでdebパッケージを作るべきかと思います…。
Configure例:
root@ibhack:~/ib/libibumad-1.3.8# ./configure --prefix=/usr
checking for a BSD-compatible install... /usr/bin/install -c
checking whether build environment is sane... yes
ーーー中略ーーー
config.status: executing libtool commands
root@ibhack:~/ib/libibumad-1.3.8# make
make all-recursive
make[1]: Entering directory `/root/ib/libibumad-1.3.8'
ーーー中略ーーー
make[1]: Leaving directory `/root/ib/libibumad-1.3.8'
root@ibhack:~/ib/libibumad-1.3.8# checkinstall -D
checkinstall 1.6.2, Copyright 2009 Felipe Eduardo Sanchez Diaz Duran
This software is released under the GNU GPL.
*****************************************
**** Debian package creation selected ***
*****************************************
This package will be built according to these values:
0 - Maintainer: [ root@ibhack ]
1 - Summary: [ Package created with checkinstall 1.6.2 ]
2 - Name: [ libibumad ]
3 - Version: [ 1.3.8 ]
4 - Release: [ 1 ]
5 - License: [ GPL ]
6 - Group: [ checkinstall ]
7 - Architecture: [ amd64 ]
8 - Source location: [ libibumad-1.3.8 ]
9 - Alternate source location: [ ]
10 - Requires: [ ]
11 - Provides: [ libibumad ]
12 - Conflicts: [ ]
13 - Replaces: [ ]
Enter a number to change any of them or press ENTER to continue:[空エンター]
Installing with make install...
========================= Installation results ===========================
Making install in .
make[1]: Entering directory `/root/ib/libibumad-1.3.8'
make[2]: Entering directory `/root/ib/libibumad-1.3.8'
test -z "/usr/lib" || /bin/mkdir -p "/usr/lib"
/bin/bash ./libtool --mode=install /usr/bin/install -c libibumad.la '/usr/lib'
libtool: install: /usr/bin/install -c .libs/libibumad.so.3.0.3 /usr/lib/libibumad.so.3.0.3
libtool: install: (cd /usr/lib && { ln -s -f libibumad.so.3.0.3 libibumad.so.3 || { rm -f libibumad.so.3 && ln -s libibumad.so.3.0.3 libibumad.so.3; }; })
libtool: install: (cd /usr/lib && { ln -s -f libibumad.so.3.0.3 libibumad.so || { rm -f libibumad.so && ln -s libibumad.so.3.0.3 libibumad.so; }; })
libtool: install: /usr/bin/install -c .libs/libibumad.lai /usr/lib/libibumad.la
libtool: install: /usr/bin/install -c .libs/libibumad.a /usr/lib/libibumad.a
libtool: install: chmod 644 /usr/lib/libibumad.a
libtool: install: ranlib /usr/lib/libibumad.a
libtool: finish: PATH="/usr/local/sbin:/usr/local/bin:/usr/sbin:/usr/bin:/sbin:/bin:/sbin" ldconfig -n /usr/lib
----------------------------------------------------------------------
Libraries have been installed in:
/usr/lib
If you ever happen to want to link against installed libraries
in a given directory, LIBDIR, you must either use libtool, and
specify the full pathname of the library, or use the `-LLIBDIR'
flag during linking and do at least one of the following:
- add LIBDIR to the `LD_LIBRARY_PATH' environment variable
during execution
- add LIBDIR to the `LD_RUN_PATH' environment variable
during linking
- use the `-Wl,-rpath -Wl,LIBDIR' linker flag
- have your system administrator add LIBDIR to `/etc/ld.so.conf'
See any operating system documentation about shared libraries for
more information, such as the ld(1) and ld.so(8) manual pages.
----------------------------------------------------------------------
---中略---
Deleting temp dir...OK
**********************************************************************
Done. The new package has been installed and saved to
/root/ib/libibumad-1.3.8/libibumad_1.3.8-1_amd64.deb
You can remove it from your system anytime using:
dpkg -r libibumad
**********************************************************************
---
これをそれぞれのディレクトリで繰り返すだけです。
ibutilsのビルドのみ若干面倒
ibutilsをビルドするときにそのままやっても、
root@ibhack:~/ib/ibutils-1.5# ./configure --prefix=/usr
---中略---
checking Tcl configuration on what Tcl needs to compile... ./configure: line 20003: /usr/share/tcltk/tcl8.5/tclConfig.sh: No such file or directory
configure: error: /bin/bash './configure' failed for ibis
と言われ失敗しました。これがどこにあるか探してみると
root@ibhack:~/ib/ibutils-1.5# find /usr/ -name "tcl*"
/usr/lib/tcl8.5
/usr/lib/tcl8.5/tclConfig.sh
と言われたので、
root@ibhack:~/ib/ibutils-1.5# ln -s /usr/lib/tcl8.5/tclConfig.sh /usr/share/tcltk/tcl8.5/
して追加してしまいました。なんか違う気がしますが。また、manを入れるdirも違うので
./configure --prefix=/usr --mandir=/usr/share/man/
としないといけませんでした。
init.dの作成
はめんどくさかったのでapt-get installで入るopensmの物を持ってきました(これはひどい
とりあえず動きます。
SMを起動する
まずデバイスドライバをロードします。古いHCAでは既にドライバを持っているので、起動時にドライバがロードされていると思います。多分ib_coreドライバなどもロードされていると思いますが、なければロードします。そうしたら、ib_umadをロードします
modprobe ib_umad
その後にopensmを実行するとこうなります。
-------------------------------------------------ライブラリなどに問題が無く無事起動したら、apt-get installでレポジトリから入るopensmのスクリプトを使って起動します。(パッケージのetc/init.d/opensm)
OpenSM 3.3.15
Command Line Arguments:
Log File: /var/log/opensm.log
-------------------------------------------------
OpenSM 3.3.15
Entering DISCOVERING state
Using default GUID 0x5ad00000bf4d5
Entering MASTER state
SUBNET UP
root@ibhack:~/ib# /etc/init.d/opensm start
Starting opensm on 0x0005ad00000bf4d5:
そして、ibstatで状態を確認します。
root@ibhack:~/ib# ibstat
CA 'mthca0'
CA type: MT25204
Number of ports: 1
Firmware version: 1.1.0
Hardware version: a0
Node GUID: 0x0005ad00000bf4d4
System image GUID: 0x0005ad00000bf4d7
Port 1:
State: Active
Physical state: LinkUp
Rate: 20
Base lid: 1
LMC: 0
SM lid: 1
Capability mask: 0x02510a6a
Port GUID: 0x0005ad00000bf4d5
Link layer: InfiniBand
activeになっているのを確認したら、ib_ipoibをロードします。これでようやくifconfig -aするとib0が出てきます。
root@ibhack:~/ib# ifconfig ib0
ib0 Link encap:UNSPEC HWaddr 80-00-04-04-FE-80-00-00-00-00-00-00-00-00-00-00
BROADCAST MULTICAST MTU:2044 Metric:1
RX packets:0 errors:0 dropped:0 overruns:0 frame:0
TX packets:0 errors:0 dropped:0 overruns:0 carrier:0
collisions:0 txqueuelen:256
RX bytes:0 (0.0 B) TX bytes:0 (0.0 B)
IPoIBパフォーマンステスト
素の状態だとibはmtuが2024ですが、connectモードにすることにより65520まで拡張できます。これによりだいぶパフォーマンスが上がります。
root@ibhack:~/ib# echo connected >/sys/class/net/ib0/mode
root@ib0:~/deb# ifconfig ib0 mtu 65520
mtuが元の状態だと
root@ibhack:~/ib# iperf -c 10.1.1.1 -i 1
------------------------------------------------------------
Client connecting to 10.1.1.1, TCP port 5001
TCP window size: 28.8 KByte (default)
------------------------------------------------------------
[ 3] local 10.1.1.2 port 42139 connected with 10.1.1.1 port 5001
[ ID] Interval Transfer Bandwidth
[ 3] 0.0- 1.0 sec 782 MBytes 6.56 Gbits/sec
[ 3] 1.0- 2.0 sec 789 MBytes 6.62 Gbits/sec
[ 3] 2.0- 3.0 sec 789 MBytes 6.62 Gbits/sec
[ 3] 3.0- 4.0 sec 790 MBytes 6.63 Gbits/sec
[ 3] 4.0- 5.0 sec 851 MBytes 7.14 Gbits/sec
[ 3] 5.0- 6.0 sec 813 MBytes 6.82 Gbits/sec
[ 3] 6.0- 7.0 sec 788 MBytes 6.61 Gbits/sec
[ 3] 7.0- 8.0 sec 801 MBytes 6.72 Gbits/sec
[ 3] 8.0- 9.0 sec 851 MBytes 7.14 Gbits/sec
[ 3] 9.0-10.0 sec 851 MBytes 7.14 Gbits/sec
[ 3] 0.0-10.0 sec 7.91 GBytes 6.80 Gbits/sec
root@ibhack:~/ib#
ですが、connect modeにしてmtuを65520にした状態では
root@ibhack:~/ib# iperf -c 10.1.1.1 -i 1
------------------------------------------------------------
Client connecting to 10.1.1.1, TCP port 5001
TCP window size: 649 KByte (default)
------------------------------------------------------------
[ 3] local 10.1.1.2 port 42141 connected with 10.1.1.1 port 5001
[ ID] Interval Transfer Bandwidth
[ 3] 0.0- 1.0 sec 1.22 GBytes 10.4 Gbits/sec
[ 3] 1.0- 2.0 sec 1.21 GBytes 10.4 Gbits/sec
[ 3] 2.0- 3.0 sec 1.21 GBytes 10.4 Gbits/sec
[ 3] 3.0- 4.0 sec 1.21 GBytes 10.4 Gbits/sec
[ 3] 4.0- 5.0 sec 1.21 GBytes 10.4 Gbits/sec
[ 3] 5.0- 6.0 sec 1.21 GBytes 10.4 Gbits/sec
[ 3] 6.0- 7.0 sec 1.21 GBytes 10.4 Gbits/sec
[ 3] 7.0- 8.0 sec 1.21 GBytes 10.4 Gbits/sec
[ 3] 8.0- 9.0 sec 1.21 GBytes 10.4 Gbits/sec
[ 3] 9.0-10.0 sec 1.21 GBytes 10.4 Gbits/sec
[ 3] 0.0-10.0 sec 12.1 GBytes 10.4 Gbits/sec
まででるようになりました。夢の10Gですね。しかし頑張ってもこれ以上は出ず、理論値は16Gbまでは行けるはずなので、やはりオーバーヘッドがあります。ネイティブじゃないので仕方ないですが。
とりあえず、IPは通るようになったのでベンチマークは後編後編に回します。
参考
http://www.openfabrics.org/downloads/OF ... _notes.txt
http://inqbus-hosting.de/support/dokume ... band-howto
ツイート
Thanks on your marvelous posting! I quite enjoyed reading it, you can be a great author.I will make sure to bookmark your blog and will eventually come back down the road. I want to encourage you to definitely continue your great job, have a nice holiday weekend!
コメントを書く
必要事項とコメントを入力して下さい。